New 2015 XP 1000 build XLR/Valor

Ratoutahell

Active Member
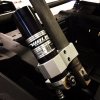
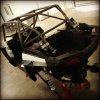
I am pretty new to the UTV Industry buying my first XP 1000 last fall. I have officially been sucked into this mad world at this point lol. I just bought a new 2015 XP 1000 and figured I would document my build. I own a firearms manufacturing company and started building some of my own UTV parts as well. I have never really done a build thread so this should be fun! Being from western Colorado my intent for this machine is to build a solid all-around machine capable of the rocks of Moab, sand dunes, desert, and mountain trail rides. I will try and go into detail of what modifications I do to this machine and why.

IMG_2198.JPG IMG_2200.JPG 10410566_848265225241283_7089223704181222665_n.jpg
 
Last edited:
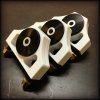
So with my first XP 1000 I broke the rear motor/transmission mount fairly quickly. I CNC'd some replacements as seen below. I upgraded the 8mm hardware to 3/8" automotive grade 8 studs. In addition I increased the size of the locating pins since the factory ones are super small. They are then hard anodized for a nice finish.

IMG_2219.JPG IMG_2221.JPG
 
Last edited:
I got some billet reservoir clamps in today for my build and was not that impressed with them so I sat down and programmed/cnc'd my own. They still need to be slotted and anodized but I think they turned out pretty sweet!

IMG_2223.JPG
 
Last edited:
UTV Inc. XP 1000 motor bar kit.

http://utvinc.com/utv-inc-polaris-rzr-xp-1000-4130-engine-mount-bar/

Ok so since I was replacing the motor mounts I figured I would get UTV Inc's new 4130 engine mount bar. I have personally never broke one of these but for $150 I figured I could not go wrong doing a little preventative care.

There is quite a bit of quality difference between the factory bar and this one. The factory bar feels "tinny" and the end caps are just spot welded on. The UTV Inc bar is beautifully TIG welded and although a bit heavier I am satisfied with the purchase.

IMG_2231.JPG
 
Last edited:
Dalton XP 1000 clutch kit:

http://www.daltonindustries.com/products_polaris_clutchkits.asp

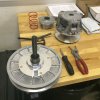
Next on my list was clutching. I have previously used a TEAM clutch kit from Dirty Dog and while it worked fine I was looking to try something a bit different. I saw some reviews on the Dalton kit and figured I would give it a go. The billet helix is definitely much nicer to look at than the TEAM cast helix. The helix is cut with (2) different ramp angles depending on your setup which is nice. I also thought the "tuning manual" was a nice touch for those that wanted to experiment with clutching but may be a bit new to it. The flyweights are adjustable with different weight rivets at the toe and set screws at the heel. The set screws can also be adjusted without having to remove or disassemble the primary which is pretty cool! Of course I am not able to function test this out on the road yet so we will have to see how it performs.

While I had the secondary apart I also replaced the powdered metal spider with a billet version from UTV Inc. Also something I have never broke but figured it was cheap insurance.

http://utvinc.com/heavy-duty-polaris-rzr-xp-1000-forged-steel-spider-insert/

IMG_2218.JPG IMG_2229.JPG
 
Last edited:
ABF Fabrication steering quickener:

https://abffabrication.com/shop/polaris-rzr-xp-1000-steering-quickener-kit-wdisconnect/

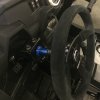
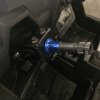
I used to race shifter karts which have a 1/2 turn lock to lock steering. When I first started driving my XP 1000 aggressively I noticed the steering seemed very slow. (2 turns lock to lock!) I always felt that I was trying to "catch up" with it. I put this steering quickener on my last build and I LOVE it! I went with the 1.5:1 with mine and I am glad I did. I was told that you can not feel much of a difference in turning difficulty with the 1:5 over stock but I would disagree. There is a bit more resistance for sure. It does not bother me even for all day rides or crawling but I can definitely see where some would not like it. If you do not drive aggressively than this is probably not the modification for you. The quickener is very well made and the install was not that bad. This comes with a quick release for the steering wheel so I coupled it with a Sparco R333 steering wheel.

http://www.sparcousa.com/product/r-333
IMG_2235.JPG IMG_2236.JPG
 
Last edited:
Holz XP 1000 trailing arms:

http://www.holzracingproducts.com/product/xp1000-trailing-arms/

I decided to go with the Holz trailing arms for a couple of reasons. I feel that weight is a huge factor for these machines so I was attracted to the idea that these are 8 lbs lighter than stock. Made from 4130 with double wall shock mounts and internal bracing they seem very well made. I also like the fact that the shock location was moved outward to alleviate some of the stress on the radius arms. Installation was a breeze! IMG_2243.JPG
 
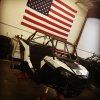
Built my own roll cage for this. It is a slight radius roof although not much. Pretty happy with it. Need to do the tin work on the roof and do a few more gusset bars but its pretty much done.IMG_2250.JPG
 
Excellent documentation on a great build. For a first time build, you are surely going at it like an experienced veteran, addressing the important issues for sure. I appreciate your going into the details as you are. It makes this thread all the more valuable to those considering similar mods to their UTE's.
 
ABF Fabrication steering quickener:

https://abffabrication.com/shop/polaris-rzr-xp-1000-steering-quickener-kit-wdisconnect/

I used to race shifter karts which have a 1/2 turn lock to lock steering. When I first started driving my XP 1000 aggressively I noticed the steering seemed very slow. (2 turns lock to lock!) I always felt that I was trying to "catch up" with it. I put this steering quickener on my last build and I LOVE it! I went with the 1.5:1 with mine and I am glad I did. I was told that you can not feel much of a difference in turning difficulty with the 1:5 over stock but I would disagree. There is a bit more resistance for sure. It does not bother me even for all day rides or crawling but I can definitely see where some would not like it. If you do not drive aggressively than this is probably not the modification for you. The quickener is very well made and the install was not that bad. This comes with a quick release for the steering wheel so I coupled it with a Sparco R333 steering wheel.

http://www.sparcousa.com/product/r-333
View attachment 11750 View attachment 11751
I installed the same steering quickener in my cousins desert racer. It works well, but there is some excessive wear in the rear bearing race of the anodized body of the unit. I believe the bearings are a bit close together when an over eager driver is allowing himself to tug on the steering wheel as he races over the rough. In defense of the product though, his steering wheel is quite a bit farther out from the quickener than is yours. It was an easy install for sure, and smart that they allowed for the factory tilt steering wheel feature.
 
UTV Inc. XP 1000 motor bar kit.

http://utvinc.com/utv-inc-polaris-rzr-xp-1000-4130-engine-mount-bar/

Ok so since I was replacing the motor mounts I figured I would get UTV Inc's new 4130 engine mount bar. I have personally never broke one of these but for $150 I figured I could not go wrong doing a little preventative care.

There is quite a bit of quality difference between the factory bar and this one. The factory bar feels "tinny" and the end caps are just spot welded on. The UTV Inc bar is beautifully TIG welded and although a bit heavier I am satisfied with the purchase.

View attachment 11747
Smart move!
If I remember correctly, the stock motor mounting cross bar used a thinner material, about .460" thick, where the sandwich plates bolted onto it. Problem is, the spread between the sandwich plates, which is determined by the motor casting to which they bolt, is closer to .500". Johnny's mounts used good old american standard thickness materials, which fit tighter between the spread and allowed for a good square interface with the sandwich plates. The slop in the factrory plates definitely was a concern of mine regarding the integrity of the bolted joint, and its ability to remain tight in race applications.
 
Excellent documentation on a great build. For a first time build, you are surely going at it like an experienced veteran, addressing the important issues for sure. I appreciate your going into the details as you are. It makes this thread all the more valuable to those considering similar mods to their UTE's.

Thanks Reid, I have learned so much from your posts on here as well as others so hopefully I can give back a bit. Plus it is fun!

-Kyle
 
You do really nice machine and fab work.....You have talent for sure, keep posting you have our attention.
 
Thanks for the comments guys.

So I made some changes to my reservoir mounts today. I was thinking that with all the variations in tube diameters because of coating thicknesses etc that having an over-bored tube clamp was not the solution as it would have a tendency to rock. What I did was cut the bore with a multi-point "clover leaf" design so no matter the diameter (to a certain extent) it would mount secure without movement. I am very happy with how they turned out. Very secure! (PS: the clamps have been tumbled hence the "galvanized" look)

IMG_2261.JPG IMG_2258.JPG IMG_2265.JPG
 
UTV Inc. XP 1000 doors:

http://utvinc.com/utv-inc-polaris-rzr-xp-1000-opening-doors/

I made it a point to try and see as many doors as I could when going to events like Camp RZR and Ralley on the Rocks etc. The UTV Inc. doors always stood out to me as having very clean lines and they appeared very well made. I previously ran Pro Armour doors and while they look ok there was a bit to be desired in regards to rattles and random latch openings. I ordered up the UTV Inc. doors for this build and they arrived very well packaged (it took probably 20 minuets to unwrap all the bubble lol) Installation was a breeze and it did not take much to get them adjusted correctly. I really like the lower door bumper feature as it adds support/pressure to the bottom of the door to help eliminate rattles. Once the rest of the machine is complete I will take it and have the doors automotive grade painted to match the white on the plastics but for now they will remain black. My only complaint so far if I was going to be picky was I feel the gap along the bottom of the door is a bit much. I understand there is going to be some variance between machines so there has to be a tolerance but I have a bit over 3/4" which I feel could be cut in half.
 

Attachments

  • IMG_2276.JPG
    IMG_2276.JPG
    421.7 KB · Views: 66
  • IMG_2277.JPG
    IMG_2277.JPG
    607 KB · Views: 75
  • IMG_2278.JPG
    IMG_2278.JPG
    551.4 KB · Views: 76
  • IMG_2281.JPG
    IMG_2281.JPG
    589.1 KB · Views: 80
  • IMG_2283.JPG
    IMG_2283.JPG
    565.2 KB · Views: 68

Members online

No members online now.

Forum statistics

Threads
17,311
Messages
179,414
Members
12,154
Latest member
KpALMA
Back
Top